Menu Reference
Edit -> Delete Selected Tris
Deletes the currently selected tris. You select a triangle by selecting all 3 of its verticies.
Select the vertices by left clicking and dragging the mouse. Single right click (without moving) to
unselect all points. You can unselect individual points in 2D mode by left clicking on them.
THERE IS NO UNDO!! Careful what you delete. Save often.
The number of currently selected points and tris is shown in the upper left of the view window.
Edit -> Point Properties...
|
Shortcut key: F5
Shows the properties for the currently selected point(s). XYZ coordinates are in meters.
TU and TV are texture coordinates, and range from top left (0,0) of the texture to bottom
right (1,1). Texture coordinates can be negative or greater than 1, it will simply
wrap around to between 0 and 1.
COL is the color of the point, in hex AARRGGBB (alpha, red, green, blue). FF is max, 00 is min. Unless
its water or an alpha tri, the alpha value should be FF (its ignored anyway).
If more than one point is selected, and the values of any attribute are different between the points,
the box will be left blank. If you type a value into the box, it will be set for all selected points. If you
leave it blank, the original (different) values will remain.
For example if you want to set a whole bunch of points to the same height, select them all, then press F5.
The Y value box (and others) will probably be blank. Type the desired height into the box, and press OK. It
will then set only the Y value of each of the points to that number, leaving the other values (x,z,etc...) alone.
|

|
Edit -> Tri Plant Properties...
|
Shortcut key: F6
Set the ground cover types for the selected tri(s). If more than one tri is selected, and the types and
density differ between them, the boxes will be blank.
The density applies to all selected plant types,
Availible Plant Types:
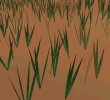 |
Grass - Short green grass. Fast, ok to be dense. |
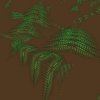 |
Ferns - More detailed fern. These are slower than the others, because of their detail. Don't use
densly. |
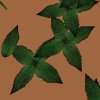 |
Ivy - Multi-leaved Ivy plants. Mostly one or two levels tall, this can grow up to 4 or 5 layers.
Fairly fast. |
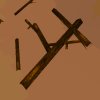 |
Sticks - Brown branching sticks. |
 |
Rocks - Small round rocks. Vary slightly in size, diameter, and number of sides. |
|
|
Edit -> Tri Forest Properties...
|
Shortcut key: F7
Set the forest type and density for selected tris. Forest Types are defined in the
forest type editor.
If more than one tri is selected and the type/density differ, the box will be blank. Setting a value
sets it for all tris, leaving it blank will not change the existing values.
Changes to these values do not take effect until you
rebuild the forest quadtree.
|
|
Edit -> Tri Speed Properties...
|
Shortcut key: F8
Changes the player running speed for the given tris. This is just a binary number between 0 and 15. I
should probably change it to a simple edit box with a number some time, but for now: slow is all blank,
normal is bits 1, 2, and 4 set, and super fast is all bits set. Numbers in between work too.
If more than one tri is selected and the type/density differ, the boxes will be blank. Setting a value
sets it for all tris, leaving it blank will not change the existing values.
|
|
Edit -> Edit Forest Types...
|
Show and edit the possible forest types. Types are listed at the
left. The trees that make up that type are listed on the right. When the forest is built, trees are
selected randomly but evenly from the list. If you want one type of tree to be included more than the
others, just include it twice in the list.
You can have up to 32 trees in one type. If you have tree1 included once, and tree2 included 19 times,
than one in every 20 trees in the world will be of type tree1, while the rest will be tree2.
All available trees are listed in the center box. Just click the arrows to move them in and out
of a type.
After changing any tree types, you should rebuild the forest
quadtree to ensure that the changes are shown in the world.
Selecting a single tree from the right box and pressing the 'edit tree props' button will bring
up the tree properties dialog.
|
|
|
This edits the properties for a given tree. Width and height are in meters, and if
you change them you must press the update button before they are applied.
The solid collision button means that a player running into the tree will fall down. If
this is not checked, the player will only slow down and it makes a rustling sound (for bushes and
underbrush).
Notice the orange lines around the tree in the picture at right. This is the shape used to draw
the tree in the world. Move the purple boxes (left click and drag) so that the orange lines make the
smallest shape covering the entire tree. This is used to make the trees faster to draw, and is very
important for large (+20m height or +10m width) trees, although it should be used for all tree types
for optimum speed.
|

|
Edit -> Set Texture Region
Shortcut key: q
This adds a new texture region that includes the currently selected tris.
See the texture region tutorial.
Edit -> Show Next Region Rect
Shortcut key: w
This shows the next region for this texture
See the texture region tutorial.
Edit -> Select Tris not in a Region
Shortcut key: e
Shows all tris that don't have a region yet.
See the texture region tutorial.
Edit -> Clear Texture Region
Shortcut key: r
Clears the regions for this texture.
See the texture region tutorial.
Edit -> Set Tri NoClip
Sets the NoClip flag for the selected tris. NoClip tris are not solid, so they cannot
be walked on. Useful for things that you want to run under, like bridges and building roofs.
Water should not have this set.
Edit -> Clear Tri NoClip
Clears the NoClip flag.
Edit -> Set Tri NoClip
When this is unchecked, tris with a NoClip flag are hidden from the view.
Edit -> Rebuild Forest Quadtree
This will rebuild the forest trees. It is not done automatically after edits because it
takes a few seconds. You should do this after you change the forest
properties, forest types, or move points/tris to see the changes.
Edit -> Reload Map Textures
Reloads all textures from their files. Use this if you change one of the texture files while
editing the map.
Edit -> Center Close Verts
Aligns any selected vertices that are within a certain distance threshold. Useful to close
seams in things.
Edit -> Flip Normals
Flip the normals of any selected tris. Non-alpha tris are only visible from one side, this will
flip the visible side. When tris are created the normal is set so that the "top" side is always visible.
Edit -> Change Texture of Sel Tris...
|
This moves the selected tris to a different texture. Pick the new texture from the list.
The assign tex coords will reassign the texture coordinates of all selected tris, based on its XZ
location. This part is not really useful unless you're remapping large sections of ground
(an entire 512m square). Just leave it unchecked and don't worry about the coord range part.
|
|
Edit -> Shade Selected Points
Shades all the selected points based on the average of the normals of each tri that includes it.
Uses white (ffffffff) as the base color. The sun direction is always the same, as are shadows.
Edit -> Shade Selected Points w/ Cur Color
Shades the selection points as above, but uses the current color of
the tris as a base.
For example: Use this if you want to make a grey rock look orange. Select all points in the rock,
then set their point color to orange (ffffbb88). Select "Shade Selected
Points w/ Cur Color" from the edit menu.
Edit -> Move XZ
Shortcut key: 1
Select the moveXZ mode. Select some points in the view window, then left-click and drag them. They'll
move around only in the XZ (horizontal) plane. Works in both 2d and 3d mode.
Edit -> Move Y
Shortcut key: 2
Moves points in the Y axis (up and down). Only works in 3d mode.
Edit -> Move X
Shortcut key: 3
Moves points in the X axis (+x is the top of the screen in 2d mode, and north on the map).
Edit -> Move Z
Shortcut key: 4
Moves points in the Z axis (+z is the right of the screen in 2d mode, and east on the map).
Edit -> Rotate Y
Shortcut key: 5
Rotate points around the Y axis.
Edit -> Rotate Y
Shortcut key: 6
Rotate points around the X axis.
Edit -> Rotate Z
Shortcut key: 7
Rotate points around the Z axis.
Tutorial Index -
CF Home
|
