This example will show how to create a textured wall (that's also will be unpassable when running) from a line symbol.
We will redefine the symbol for the high stone wall (symbol number 521.0), since the default parameters in the 1.3 converter version for this symbol will not create a high wall and it will also be passable.
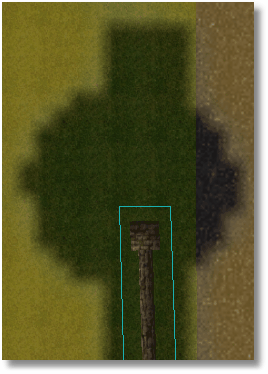
1. Create a sample map that use a high stone wall symbol (521.0), for example looking like this:
2. Start the OCAD Converter and select the file. When you get to the Convert Ocad File window, select the symbol set file you want to change.
3. Do a user-controlled conversion of the OCAD file.
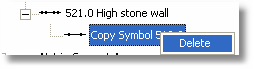
4. When you reach Step 2. Check Symbol Set, the symbol 521.0 should now be listed in the Ok Symbols section of the symbol set. You should find an already existing definition for the high stone wall (which just copies the low stone wall, symbol number 519.0). Delete this definition by right-clicking on the Copy Symbol 519.0 and select Delete from the contextual menu.
The symbol should now move to Unrecognized Symbols.
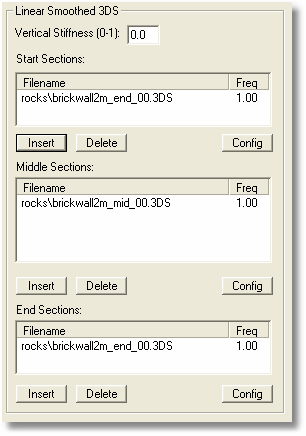
5. Right-click on the symbol number, and select LinearSmoothed3DS from the Insert submenu.
6. Set Vertical Stiffness to 0
7. Press the Insert button for Start Sections, and add the file brickwall2m_end_00.3DS, that's located in the editor\rocks folder.
8. Press the Insert button for Middle Sections, and add the file brickwall2m_mid_00.3DS, that's located in the editor\rocks folder.
9. Press the Insert button for End Sections, and add the file brickwall2m_end_00.3DS, that's located in the editor\rocks folder.
10. The pane should now look like this:
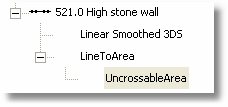
11. Right-click once again on the symbol number and select LineToArea from the Insert menu. Set the Convert line to area with width option to 1.0 - 1.0 meters.
12. Right-click on the added LineToArea and select UncrossableArea from the Insert menu. Set the Expand Perimeter option to 0 meters.
13. The parameters for the high wall symbol should now look like this:
14. Save the symbol set by pressing the Save button to the top left.
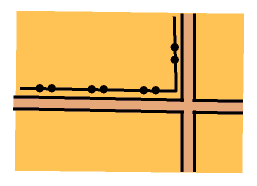
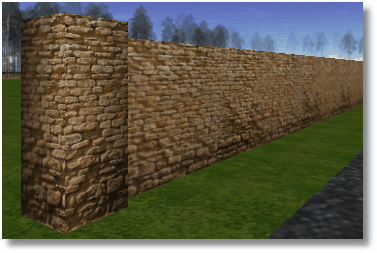
15. If you want to see how the end result, select Run to Finish in the Convert menu. The result should look something like this:
16. After you have created a 3D map, it's important to check the uncrossable boundaries around line objects like these! The ends of (in this case) the 3D wall parts can sometimes mismatch with the end of the 2D line on the map, if the 3DS files that are used are long.
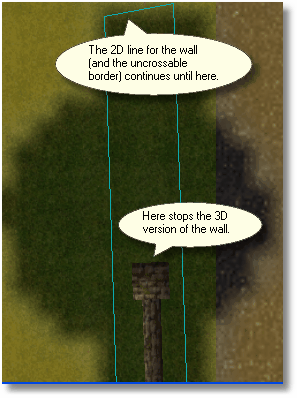
If there's a case of mismatching, you have to manually adjust the uncrossable borders in the Catching Features Map Editor (using the Edit/Edit 2D Barriers function). Here's a corrected version: